have we met before?
login or create an account
login or create an account

Unless you only have eyes for container candles, it is very much probable that the first steps of your candlemaking "career" will be the creation of a pillar candle.
Pillar candles have everything to please : not only are they the most popular type of candle (a close tie with container candles, though), they don't require a lot of equipment, are relatively easy to make and allow you to unleash your creativity with their endless choice of shape, size and appearance. This article explains in details how to create your first pillar candle.
We have already reviewed the equipment you need to make a pillar candle. But for the sake of completeness, here is an exhaustive list of every item I used in the video that documents this project.
Cover your work area with plenty of waxed paper; this will hugely minimize the consequences of any spill you might make. Place your melting pot containing the paraffin wax in the double boiler until all the paraffin has melted. When the last bit disappears, the temperature of the wax usually averages 176°F.
While you wait for the paraffin to melt, cut the wick at the desired length : the height of your mold plus an extra 2 inches (one inch for each end of the mold). Set the wick aside for now, you will have to prime it when the paraffin wax has melted entirely.
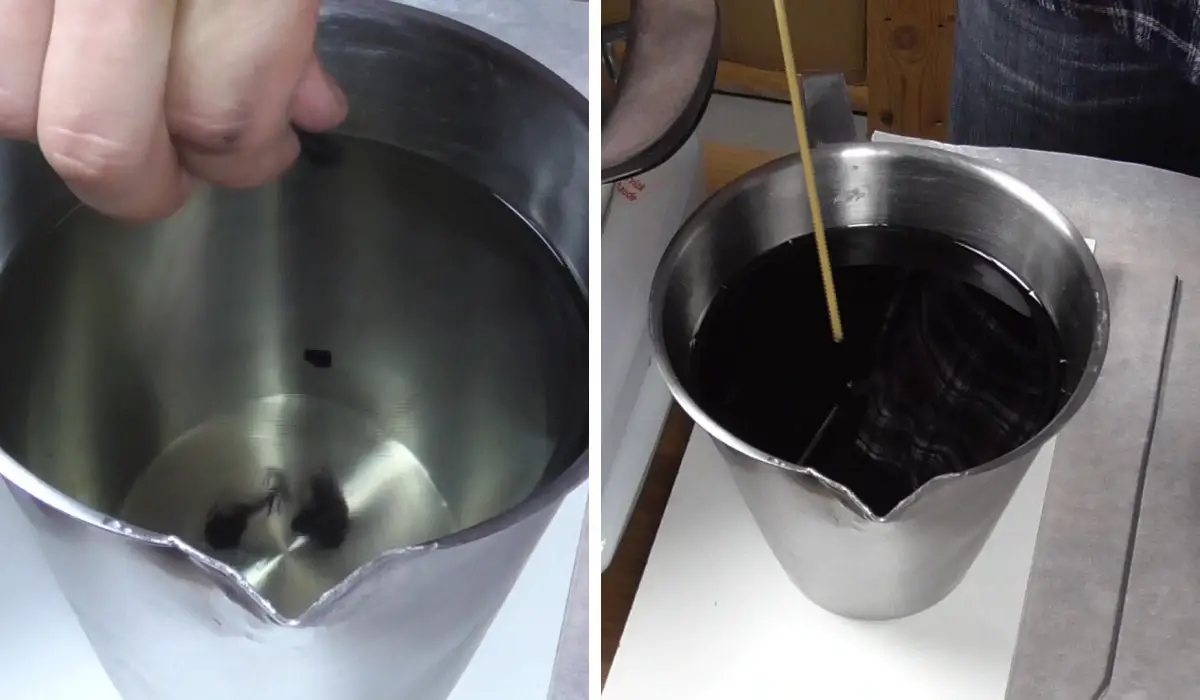
When the paraffin is liquefied, throw the wick at the bottom of your melting pot and let it soak up wax for about 2 minutes. Tiny air bubbles appearing at the surface are a sure sign that any air present in the threads of the wick are being replaced by paraffin, which is exactly what we want. When the two minutes have passed, use your needle to fish the wick out of the wax and place it on the waxed paper. Pull gently on each end of the wick so that it will be as straight as possible when it hardens. After a few minutes, the wick should be completely stiff and ready to be installed inside the mold.
Use the thermometer to make sure the temperature of the paraffin wax ranges between 176°F and 194°F. If that's not the case, adjust the dial of your cooker and wait for the wax to reach the desired temperature. Otherwise, slowly add the stearic acid and stir until complete dissolution.

The time has come to install the wick in your mold. Insert it through the wick hole at the bottom of the mold and thread it in until a length of about 1 inch remains. Push the remaining bit of wick against the bottom of the mold to keep it in place. Now grab a small bit of mold sealer, about the size of your thumbnail. Because the mold sealer I use is actually plumber putty and is rather greasy, I systematically cover the visible bit of the wick with a tiny piece of waxed paper before I apply the mold sealer. Now put the mold sealer on top of the wick, press it tight and spread it so that it covers the wick entirely. Spread it even more and flatten it as much as possible, but remember it's there to act as a seal. When done, flip the mold upside down, make sure it is steady and level; then use the wick holder to keep the wick straight, to immobilize it and keep it centered during the whole pouring / setting process.
Remove your melting pot containing the paraffin wax from the double boiler; use an old kitchen towel to wipe off water from its surface to prevent it from mixing with the wax when you pour. Add the dye but be very light-handed: candle dye is extremely concentrated and it is a lot easier to add some if necessary than remove it. Now stir thoroughly until every single grain of dye has been dissolved into the wax.
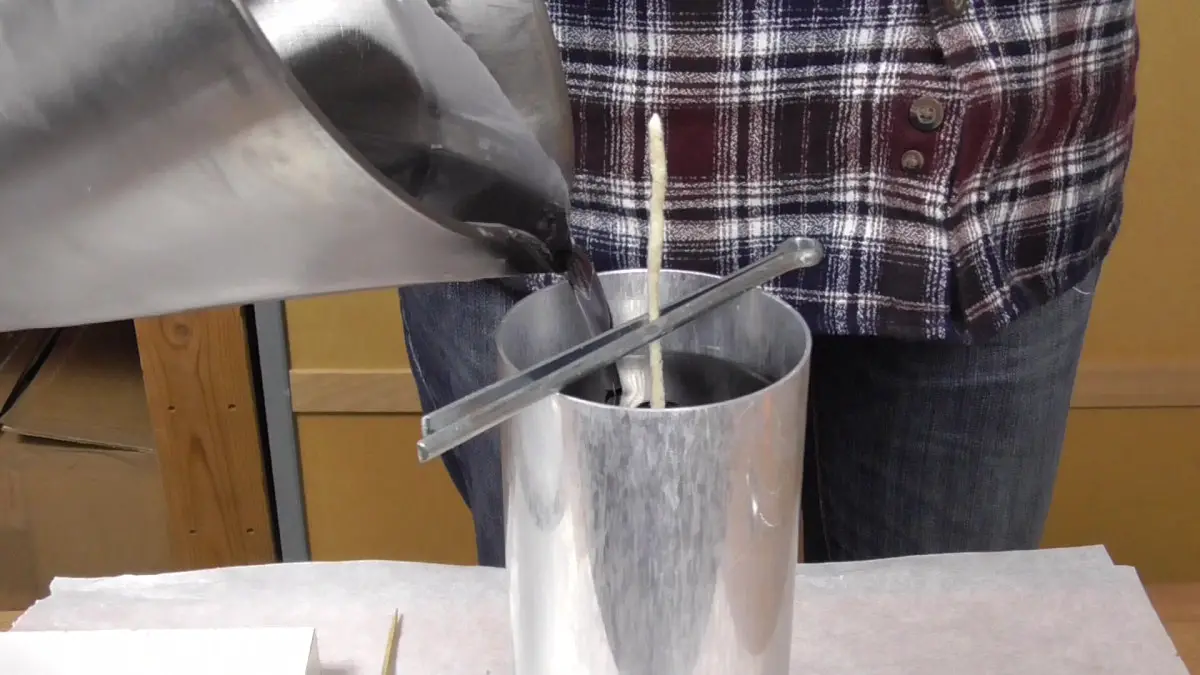
For this project, the idea was to give my pillar candle a rustic appearance rather than a smooth and shiny one. This effect can be achieved by allowing the temperature of the wax to drop almost to the point where it starts to solidify again before you pour it into the mold. That temperature varies in function of the wax type and / or the brand but, generally speaking, a temperature of 140°F or just below that should do the trick. Use your thermometer to keep an eye on the temperature of the wax and, when it drops to 140°F, slowly pour it into the mold. At such a low temperature, the paraffin has lost most of its fluidity : if you pour too quickly or from too high, you will create a fair amount of air bubbles that won't get a chance to pop and will get trapped just beneath the surface. Fill the mold to about 3 millimeters below the rim and make sure you save a small amount of wax that will be used later to fill the sink hole that will appear (see below).

Depending on the amount of wax your mold can hold, the cooling process will take more or less time. About an hour after your first pour, check your candle-to-be : you will notice that a cavity starts appearing between the sides of the mold and the wick. This cavity, called the sink hole, is a normal occurrence and is due to the fact that paraffin contracts when its temperature drops. The size and depth of a sink hole can be impressive. On top of that, this contraction of the wax tends to create air pockets alongside the wick, under the surface. It is essential that these air pockets be eradicated if you don't want the flame of your candle to go out when it reaches one of them.
To allow you to fill any potential air pocket and at the same time the sink hole that is taking shape in front of your eyes, use your needle to pierce several (at least 5 of them) vertical holes all the way down the candle, about half an inch away from the wick. Push the needle deep into the wax but make sure you don't touch the bottom of the mold as this could damage what will become the top of your candle. Do not wait too long to pierce these holes : if the wax is too hard, piercing it will be impossible but too soon ain't good either as the holes would collapse and disappear almost immediately. Practice and experience will soon kick in and you will know instinctively when it's time to pierce the holes. When all the holes have been made, put your melting pot with the remainder of the wax in the double boiler.
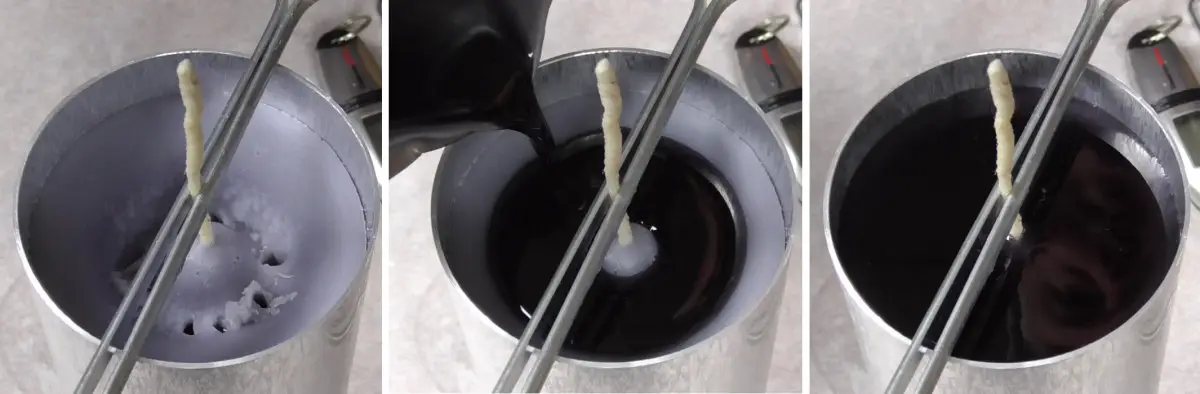
When what is left of your wax has melted and reached a temperature of 167°F, slowly pour it into the mold. At this temperature, the paraffin is fluid enough to seep into the holes you created and fill any air pocket that might be there. You will see quite a few air bubbles escaping to the surface, a clear sign that there were air pockets indeed.
Make sure you don't pour above the original level of the wax ! In the video, I accidentally did and this resulted in a a strip of wax of a different shade at the bottom of the candle. Allow your candle to cool off until the mold is cold to the touch.
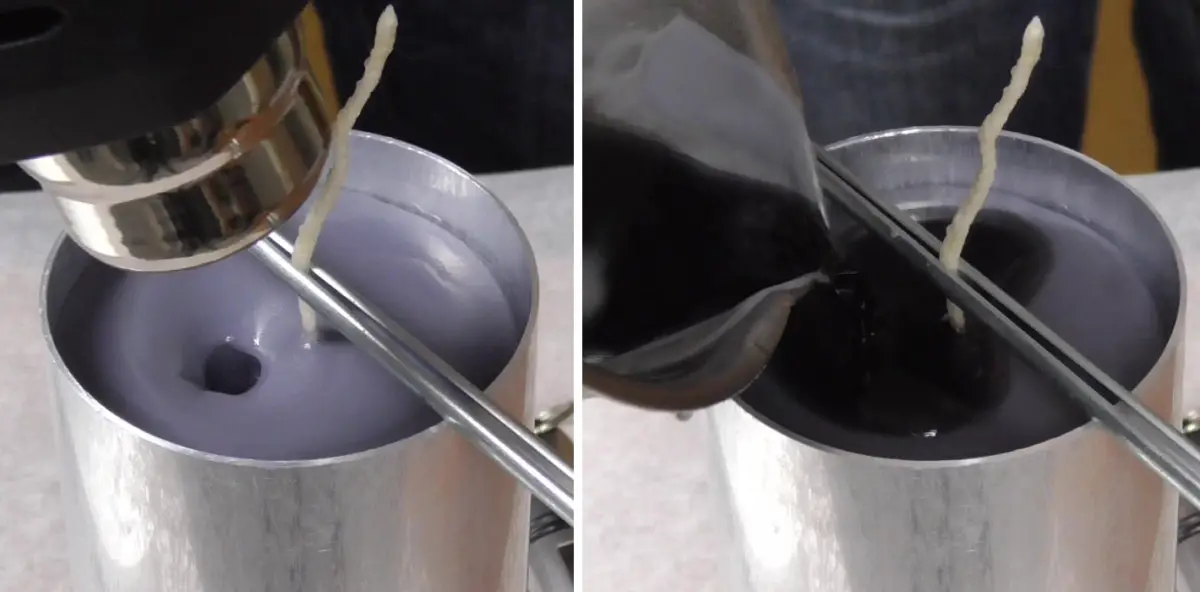
In all likelihood, a new cavity will have formed, fortunately much smaller than first one. So put the remainder of the wax back in the double boiler until it melts and, when the temperature reaches 167°F, perform a new pour, still making sure you don't go over the initial level. Before you do, you can melt the wax at the surface of the candle with a heat gun, this will help with a better adhesion of the wax you are about to add.
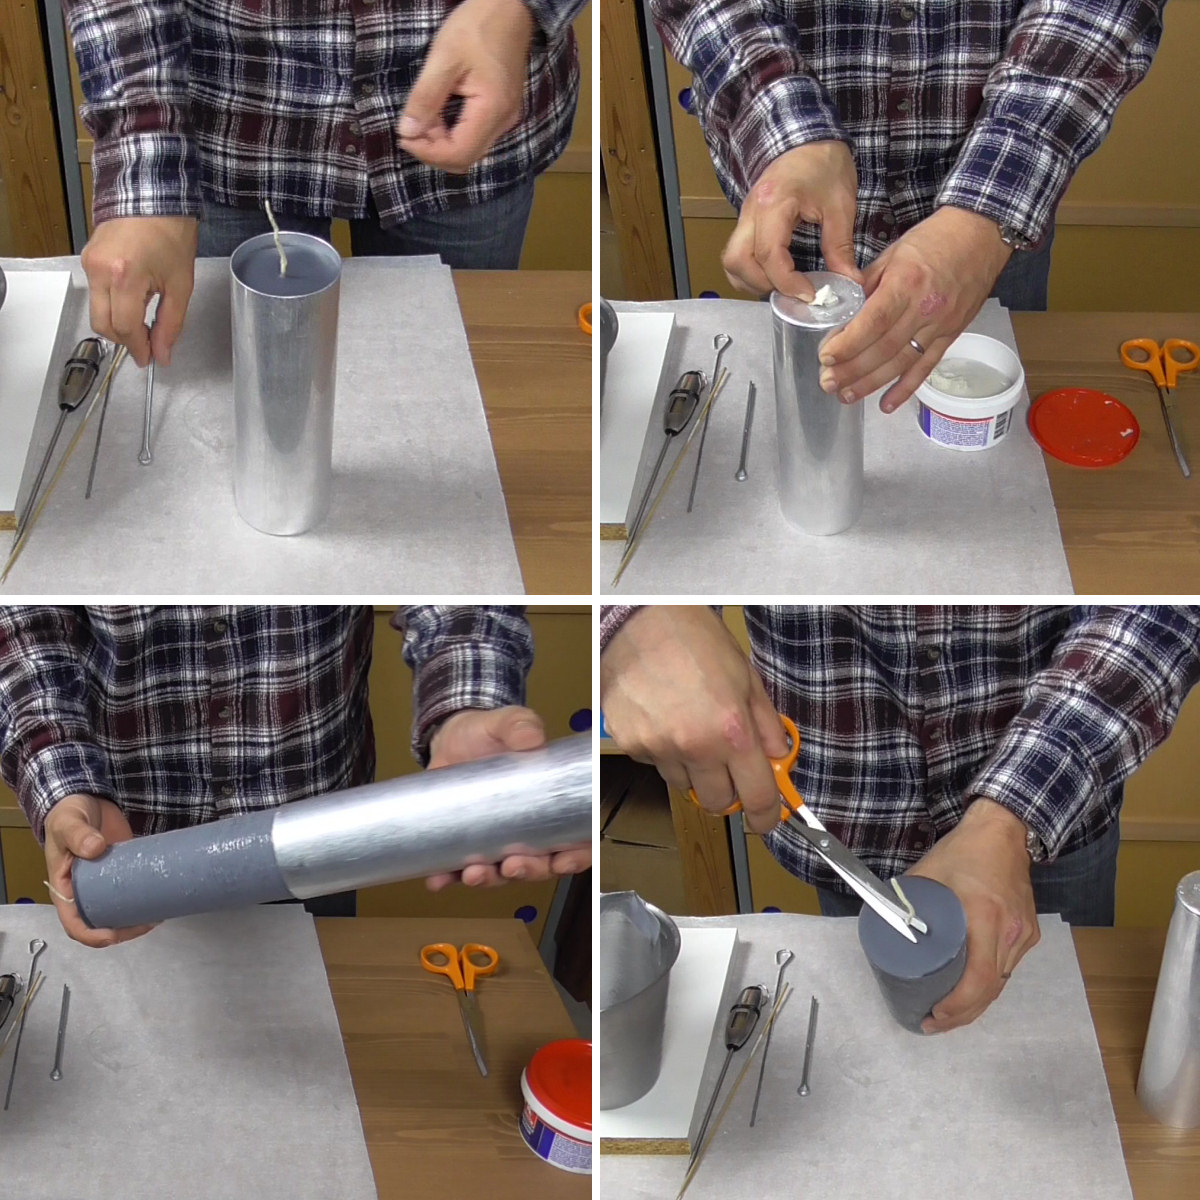
When this last layer has completely cooled down, let the candle settle for about 24 hours. After that time, remove the wick holder, flip the mold upside down and also remove the mold sealer (it can be reused as long as it's not awfully dirty). Try and unmold the candle : this should be very easy if you used a metal mold, added stearic acid to the wax and allowed the candle to cool down completely. If the candle resists and doesn't want to leave the mold, place the mold in the fridge (never the freezer) for about an hour and give it another try. Refrain yourself from pulling on the wick to try and dislodge the candle.
When the candle is free, cut the wick at the bottom of the candle (the side that used to be the top of the mold). Make sure you've got the correct end or you will end up with a wickless candle !!! On the top side of the candle, trim the wick to about 7 millimeters (about 1/3 of an inch).
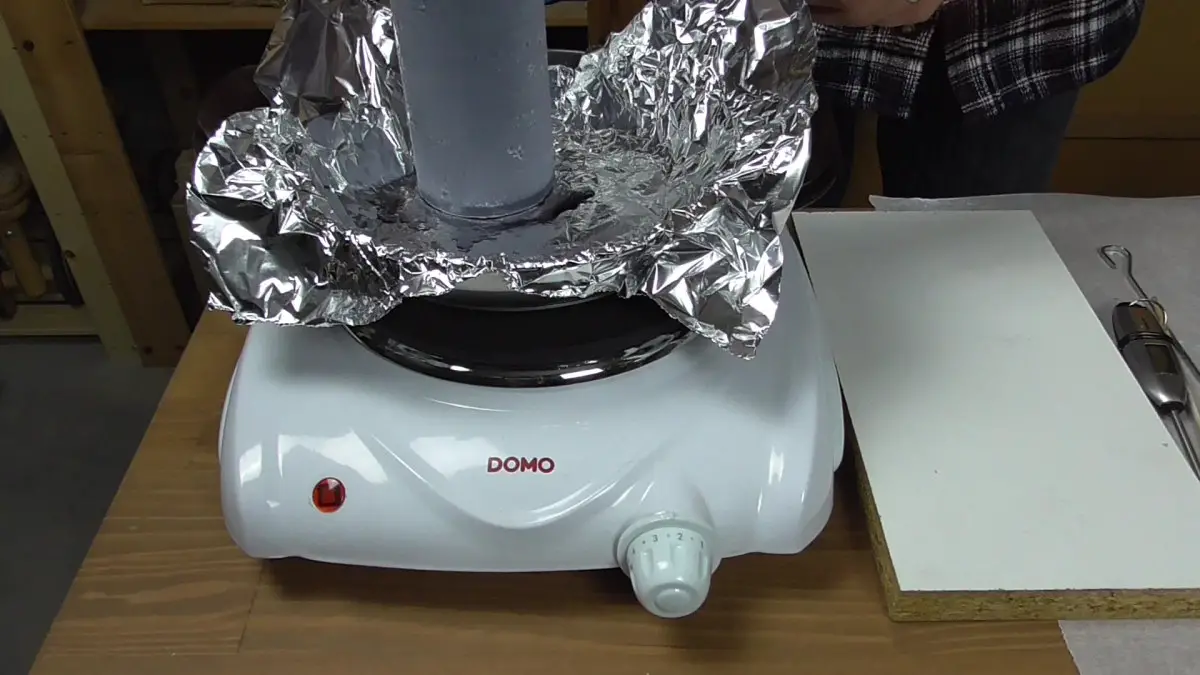
You would be very lucky if the base of your candle was perfectly flat and level. But don't worry if it's not, there's a solution : place a piece of aluminum foil in a small frying pan and fire up your cooker, keeping it at a very low heat. When the aluminum foil is hot, press the base of your candle against it and move the candle around a bit, making sure you keep it perfectly level. This will melt down the bumps and pits in the wax and you should end up with a nice, level base.
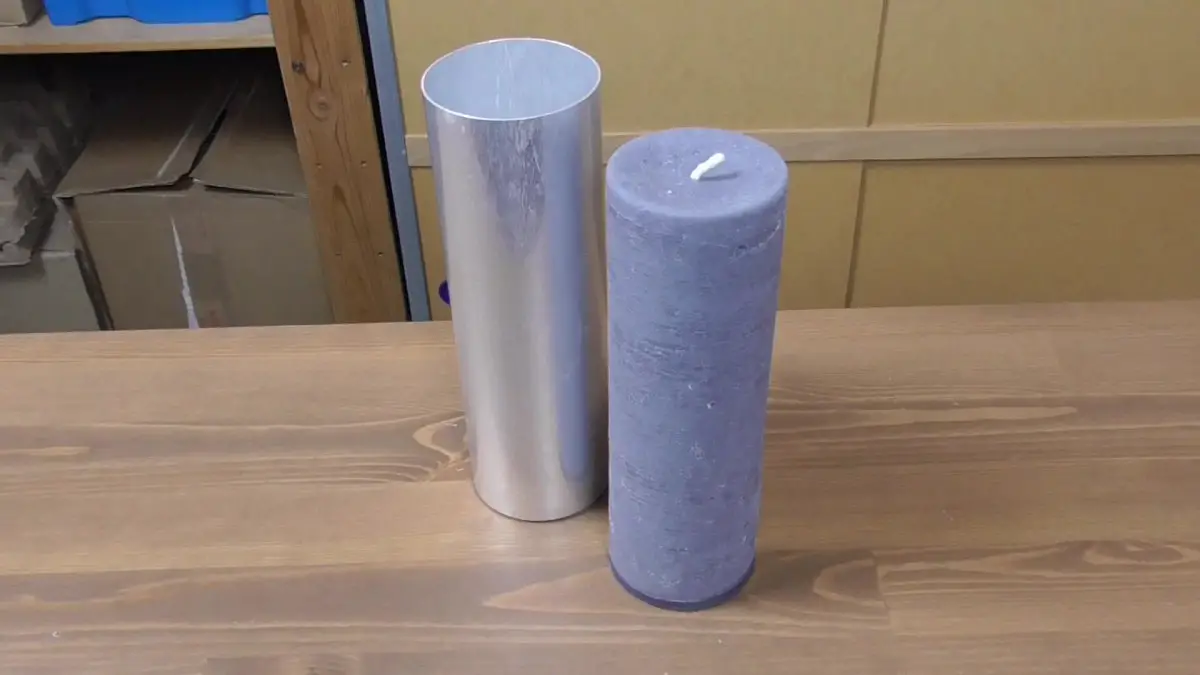
You have just made your first pillar candle. See you soon for new candlemaking projects.
 Thanks a bunch!