have we met before?
login or create an account
login or create an account

This fun technique may have different names: ice candle, cheese candle, moon candle... but the result is always a candle with a great look: full of holes !
The finishing touch can also differ and give the finished candle a different look but in this article, we will make the basic version of this candle, without flourish.
The secret of this great candle with a tortured look? Ice blocks !!!
and of course the usual supplies: double boiler, melting pots...
It is rather difficult to keep ice blocks away from the wick during the pouring process and a wick should always be surrounded by a fair amount of wax for a candle to burn safely and correctly. Because of this, we won't use an actual wick but a taper candle, homemade or not.
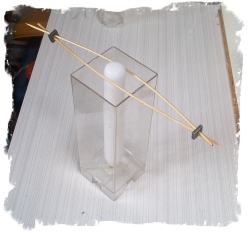
Thread the wick of the taper candle through the wick hole of the mold and use some mold sealer to avoid wax leaks while pouring.
The taper candle (called core candle in this case) will need to remain in place and centered during the whole process. Use an appropriate wick holder and don't forget that putting ice blocks in the mold may apply pressure on the core candle. Moving the candle once the ice blocks are in the mold will be tricky if not impossible...
Before you start (and don't ask why I insist), MAKE SURE you will have enough ice blocks available to fill the mold and that they're small enough to fit in the space between the sides of the mold and the core candle. If you have been using a classic ice cube tray, these ice cubes will probably be too large. Check before you start!
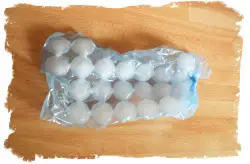
I've always had good results with ice blocks made in those plastic ice cube bags. Just place one under the faucet, fill it with water, make a knot to seal it and place it in the freezer. You will get a bunch of nice, egg-shaped ice blocks, flat enough to fit snuggly around the core candle.
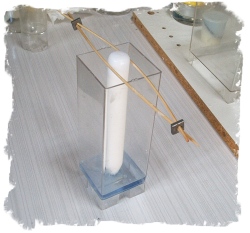
Before you start filling the mold with ice blocks, pour a thin layer (5mm) of wax at the bottom of the mold.
This will ensure that the top of the candle is free of holes and that the wick of the core candle doesn't soak up too much water when the ice blocks start to melt.
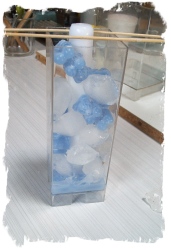
When this first layer of wax has settled, you can start filling the mold with ice blocks.
You can use ice blocks exclusively but in this example, I used a mix of ice blocks and tiny wax teddy bears (just for fun).
Feel free to use wax chunks or not, with multiple colors or not, it's up to you: the result should be just the same.
Fill the mold to the top (but not higher) then shake it gently to pack the ice blocks together. Add some if necessary.

Of course, you should fill the mold with ice blocks only when your wax has reached the right pouring temperature: between 176°F and 185°F.
Once the ice blocks are in the mold, you should work pretty fast or you will end up with an aquatic candle...
Your wax is ready? Pour it over the ice blocks and to the top of the mold. Gently tap the mold with a wooden spoon to release any trapped air bubbles and add more wax if necessary.
If the core candle sticks out, no problem: you will cut any protruding bit when your ice candle is finished.
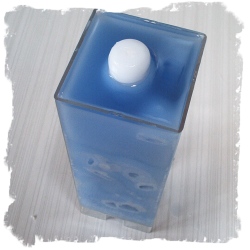
Quite evidently, because of the ice blocks, this kind of candle will cool off much faster than a pillar candle of the same size (but without ice blocks) would.
However, a sink hole may appear on top of the mold. As usual, you should fill it up with some hot wax.
While the candle cools, let me draw your attention to one point: the wick size of the core candle is based on the diameter of that candle and not on the diameter of the ice candle. This means that, because the wick is too thin for the ice candle, the flame will "dig a well" in the center of the candle as it burns.
In the case of an ice candle, it really is no problem because the light of the flame combined with the tortured surface of the candle will result in very fancy light effects. But if you want to avoid this, instead of a core taper, you could use a self-made, very thin pillar candle with an oversized wick whose size matches the diameter of the ice candle.
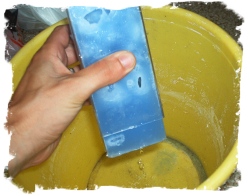
When the candle has cooled off completely and you're ready to unmold, do not forget (as I usually do) that ice blocks turn into water when they melt: when the candle comes out of the mold, a surprisingly large amount of water will follow, so make sure you unmold it above a basin or a sink. You will also need to turn the candle upside down several times to release any water trapped in the wax.
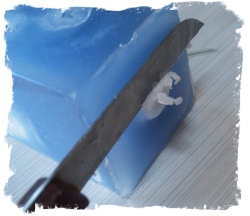
If your core candle was too long, use a sharp knife to trim it and make it level with the base of the candle.
As always, you can level the base by placing it against a hot plate covered with aluminum foil.
It is highly recommended to let this type of candle dry at least one week before you light it up. During the pouring process, the wick has soaked up a fair amount of water and needs time to dry completely.
Before you light your ice candle, shake it close to your ear to know if there are water pockets trapped inside the wax shell. If it's the case, there's not much you can do about it but be aware that when the flame reaches such a water pocket, the candle will go out with a big pssshhhhhhhhh!
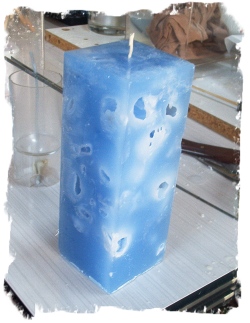
Congratulations, you have just made an ice candle!
To achieve a different look, you can quickly dip the finished ice candle a few times in hot water. This will melt some of the surface wax, smooth the edges of the surface holes and give the candle a softer look.
You can also try using crushed ice instead of ice cubes, as long as it is not crushed too thin.
 Thanks a bunch!