have we met before?
login or create an account
login or create an account

This interesting project combines the techniques of 3 different types of candles: the pillar, hurricane and Container candles.
We'll take the following steps: fill a pillar mold (without a wick) with colored paraffin and, when the wax starts to harden (it always starts with the sides of the mold) and a hard shell about 5mm thick has formed, pour out the remaining (still liquid) wax and let the shell cool off completely.
Then, install the wick and fill the shell with a container wax blend of a different color. The result is an original, nice-looking candle.
and of course the usual suspects: melting equipment, thermometer, melting pots, waxed paper...
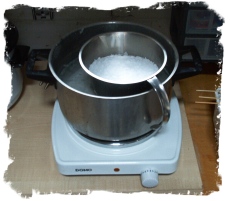
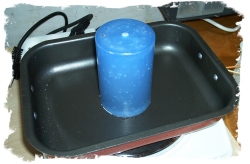
Once you have gathered all the tools and supplies you will need for this project, place the pillar blend in your double-boiler. This wax blend will be used to create the "shell" that will later hold the container wax blend and will act as the actual container.
As you will use two different colors for the shell and the wax inside and that the walls of the shell will be relatively thin, it is a good idea to add a fair amount of stearin (stearic acid) to your pillar wax blend. This will make the wax more opaque and will prevent the color of the inner wax from showing through.
A mix of 20% stearin / 80% paraffin wax is a good starting point.
Time to prepare the mold. There's no need to wick it: you're making a wax shell and not a regular pillar candle. The shell is too thin to hold the wick steadily in place so we'll take care of the wick once the shell is ready.
For the time being, just plug the wick hole of the mold with some mold sealer.
Before you pour the pillar blend into the mold, prime the wick and place it on a piece of waxed paper to harden (make sure it's as straight as possible).
When the temperature of the wax has reached 185°F, you can add the dye to your wax using the color of your choice. Remember: you want an opaque wax for the shell so add just a little more candle dye than you normally would.
Before you stir, give the dye some time (a couple of minutes will do) to dissolve into the hot wax. Then, stir thoroughly with an old spoon or a bamboo skewer until the dye is homogeneously mixed with the wax. Stirring well is particularly important when the amount of dye is above average.
Turn off your double boiler and let the wax temperature drop to about 158°F. At that stage, it's time to pour the wax in the prepared mold.
Fill the mold up to 5 mm from the top and tap the sides of the mold with a wooden spoon to release potential air bubbles that may be present in the wax.
Depending on the size of your mold and the temperature of the room, the wax will need somewhere between 10 and 30 minutes to harden enough and for a shell to form. Take a break if you want but don't lose track of the time: if you wait too long, you'll end up with a (wickless) pillar candle. Not really what we've worked so hard for...

Wax always starts to harden at the sides of the mold (most exposed to the much lower room temperature) and this is exactly what we want in this case. As soon as a skin starts to form at the surface of the wax, use your wicking needle and break it apart (or remove it if it's thick enough).
Breaking the surface skin will give you an idea of the current thickness of the shell (but keep in mind that is looks thicker than it actually is). Keep breaking or removing the surface skin as soon as it reappears.
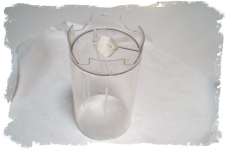
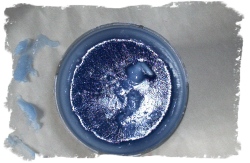
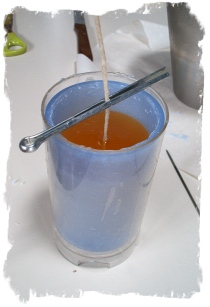
This picture shows the shell that starts to form in the mold.
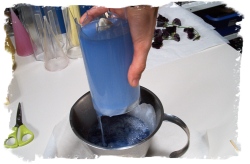
When it looks like the shell has the desired thickness (at the very least 5mm), break or remove the surface skin one last time then pour out the wax from the mold back into your melting pot. When the bulk of the liquid wax has left the mold, keep the mold perpendicular above the dipping jug during at least 30 seconds.
Hold it perfectly upright to avoid the formation of wax streams on the inner walls of the shell. Don't worry about the aspect of the top of the shell, you will take care of that later on.
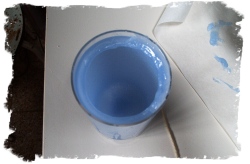
When all the liquid (or rather tacky) wax has left the mold, put the mold back on your work table. The inner walls of the shell should be flat and relatively smooth.
Now give the shell all the time it needs to fully harden.
In most cases, the hard wax shell should pop out of the mold when you turn it upside down. If it won't come out by itself, it can be a sign that the shell is not hard enough yet.
The hardness of the shell is essential for the outcome of the next steps !
Before you unmold the wax shell (if you removed the shell from the mold already, just slide it back in), remove the mold sealer at the bottom of the mold and clean the wick hole as good as you can (mold sealer can be hard to remove from a polycarbonate mold).
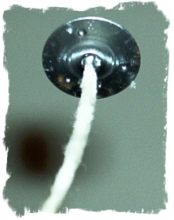
Leave the shell in the mold and heat the sharp end of your wicking needle (or thin knitting needle) above the flame of a candle or lighter. Run the needle through the wick hole to make a hole for the wick in the shell.
Do not force the needle through the shell: you could break the bottom! If you feel resistance, reheat the point of the needle and try again.
You can now remove the shell from the mold.
Your next task is to flatten and smoothen the top of the shell (which is probably necessary). The bulk of the excess wax can be removed using an old kitchen knife. To make it easier, regularly plunge the blade in boiling water.
When the top of the shell is more or less plane, place it a few seconds on a hot surface (I use an old cookie sheet that I heat on the hot plate) to make it perfectly level.
Prepare your wick: using a needle nose pliers, secure a wick tab at one of its ends.
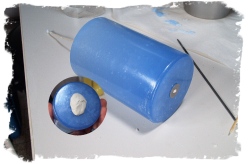
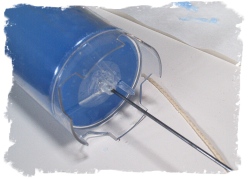
Then, from the outside of the shell, thread the wick through the hole you created with the needle. The wick tab will keep the wick in place and make sure it won't come out when you install the wick holder.
As illustrated in the picture, cover the wick tab with a generous amount of mold sealer to avoid wax leakage during the next pour.
Pull on the wick gently to straighten it, hold it in place with a wick holder and make sure it is perfectly centered in the shell.
When this is done, place the shell back into the mold. The hot container wax blend will soften the shell and putting it back into its mold will prevent a warping of the shell walls (and possibly its collapse). But if you want to, you can use the softness of the shell to give the candle an original shape (obese candle and other fun effects), but do this only when the wax has started to cool off. Be aware that removing the candle from the mold while it's still warm can make it very fragile and unstable: you will have to watch it constantly if you don't want it to collapse.
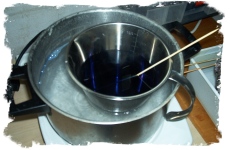
The time has come to prepare your container wax blend. Color it so that the color of the shell and that of the inner wax do contrast but do not clash with each other.
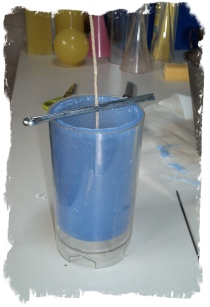
Like you would for a regular container candle - see the article Container candles - How to make them ? - let the wax cool off as much as possible before you pour it in the shell. It's even more important in this case because the last thing you want to do is melt the shell !
As usual, poke relief holes along the wick and fill the sink hole if one appears (the overpour wax should not be too warm or, again, you might melt the shell).
When the candle is completely cold, remove the wick holder and unmold the candle. Trim the wick to a length of about 5mm.
Remove the mold sealer from the bottom of the candle and polish the surface of the shell with an old pantyhose.

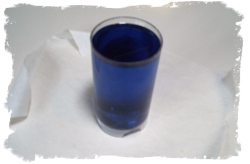
You're done! You've just completed a fun project that uses the techniques that apply to pillar, hurricane and Container candles.
If you never made a hurricane shell, you've just learned the basics of this technique. The hardest part of this project is to correctly eyeball the thickness of the shell walls. The temperature of the container wax is critical as well.
Have fun giving your candles peculiar shapes by not replacing the shell in the mold prior to pouring the inner wax (but then, pour small amounts at a time).
 Thanks a bunch!